2.4 Smart Light
-
Have you ever seen a smart light? A smart light has sensors that can detect when to turn on or off.
Does your house have an outdoor security light that turns on when you arrive home at night? This is one example of a smart light that uses motion sensors to detect if someone approaches and then activates the light for them.
Have you ever seen clap lights? This is another example of a smart light that uses sound sensors (and/or motion sensors) to detect when someone claps their hands, and uses that action to activate or deactivate the lights. -

The micro:bit has a built-in microphone, which we can use to measure sound levels. You can use the
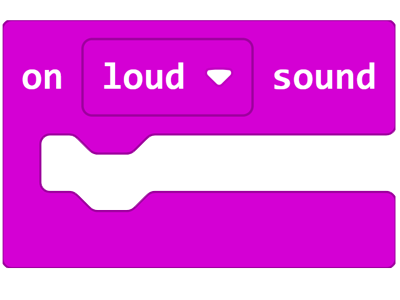
on loud sound and
on quiet sound blocks to detect sounds at different volumes and use those sounds as inputs to trigger actions. There is also a built-in sound level variable, which stores the last detected sound level as a number.Here are some tips on how to use the micro:bit microphone blocks:
- You can find all of the code blocks for accessing the microphone in the Input menu in MakeCode.
- Use the on loud sound block to trigger actions when a loud sound is detected.
- Change the middle section of the code block to use
on quiet sound to trigger actions when a quiet sound is detected. - Use the sound level variable in situations where it is useful to work with the current sound level as a number.
- Sound level can be used as an input. Think about how you might be able to use sound instead of a button in some of your projects.
- You can find all of the code blocks for accessing the microphone in the Input menu in MakeCode.
-
The Challenge
- When the micro:bit detects a loud sound, the display will flash.
Required Devices
- 1 micro:bit
Suggested Blocks
- show leds
- clear screen
- on loud sound
Bonus Challenges
- You can use the change score by 1 block to create a cool flashing effect. Try using that instead of show leds and clear screen.
- Can you make the micro:bit play a sound as well as flashing the display?
- Can you keep track of the number of loud noises the micro:bit has detected using a variable?
- Can you make the micro:bit show a random icon when you clap your hands?
-
The micro:bit display is made up of 25 small LED lights. This display can only be turned on or off or dimmed, and will only glow a red colour.
The Digital RGB LED device is a Neopixel LED light that features 1 RGB LED. Commonly, NeoPixel lights are found in strips of lights. These Neopixel strips feature multiple RGB LEDs embedded onto a flexible circuit board. Although our device only uses 1 RGB LED, the code blocks in the Neopixel Extension will use the language of strips. In our case, ‘strip’ will refer to our single Digital RGB LED.
RGB stands for “Red, Green, Blue” and symbolizes that the LED light has adjustable amounts of red, green and blue pixels, and that by combining different amounts of these pixels, we can program the light to show in different colours.
By adjusting the amounts of red, green and blue pixels (in a range between 0 and 255), you can also create additional colours like orange, yellow, or purple. If you set the colour of a digital RGB LED to “black”, you are effectively turning off the light.
-
Let's download the Neopixel extension in the same way that we downloaded the DHT11_DHT22 extension in Lesson 2.2.
The Neopixel extension allows us to access new code blocks that let us program the RGB LED. Here's some of the things the Neopixel code blocks allow us to do:
- Choose the pin on the sensor:bit that our Digital RGB LED will connect to.
- Show the colours of red, green or blue at different brightness levels.
- Adjust the amount of red, green or blue pixels being shown in the RGB LED, which will cause the light to show a different colour.
- Allow the RGB LED to blink or cycle through colours.
- Allow the RGB LED to show a spectrum of colours and hues, including colours such as orange, yellow, and purple.
Here are some tips on how to use the Neopixel extension blocks:
- You can find all of the code blocks for using the RGB LED in the Neopixel extension menu in MakeCode.
- You'll need to use the set strip to NeoPixel block to begin using the RGB LED. Set the pin value to match the pin you've connected the RGB LED to on the sensor:bit, and set the number of leds to 1.
- Use the strip show color block to set the RGB LED to show red, green, or blue.
- Use the red 255 green 255 blue 255 block to combine red, green, and blue pixels to make a new colour. You can find this block in the more section underneath the Neopixel menu.
- Choose the pin on the sensor:bit that our Digital RGB LED will connect to.
-
The Challenge
- When you press the A button an RGB LED turns on.
- When you press the B button an RGB LED turns off.
Required Devices
- 1 micro:bit
- 1 sensor:bit
- 1 Digital RGB LED
Suggested Blocks
- on start
- on button pressed
- set strip to NeoPixel
- strip show colour
Hints
- You will need to have the NeoPixel extension installed to complete this challenge.
Bonus Challenges
- Can you tell the RGB LED to turn itself off automatically after 5 seconds?
- Can you tell the RGB LED to flash when you press the A button, then turn off when you press the B button?
-

Math blocks allow the user to use mathematical equations and operations inside other code blocks.
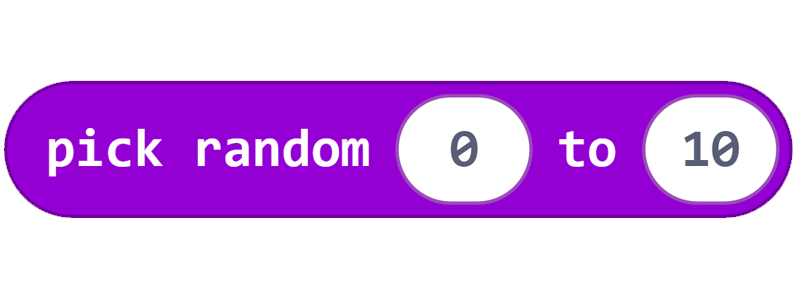
The pick random block tells the micro:bit to select a random number value within a given range. Thepick random block can be found in the Math menu in MakeCode.
Each time the pick random block is run, a random number will be generated within the given range.
Random numbers can be used for many different purposes. We can set the highest and lowest numbers that can be chosen, so the micro:bit will generate a random number between those chosen values (for example; lowest = 0, highest = 255, and a random number will be chosen between those two numbers).Here are some tips on how to use the pick random block:
- You can find the pick random block in the Math menu in MakeCode.
- You'll need to set the highest and lowest numbers you want the micro:bit to choose between.
-
The Challenge
- When you press the A button an RGB LED turns to a random colour.
- When you press the B button the RGB LED turns off.
Required Devices
- 1 micro:bit
- 1 sensor:bit
- 1 Digital RGB LED
Suggested Blocks
- on start
- on button pressed
- pick random
- set strip to neopixel
- strip show colour
- red “255”, green “255”, blue “255”
Hints
- The colour values of an RGB LED range between 0 and 255. If you want a completely random colour, try setting your random range between 0 and 255. If you want to limit the randomness, try reducing the range.
Bonus Challenges
- Can you make two RGB LEDs blink random colours when you press the A and B buttons together?
- Can you make the RGB LED cycle through different colours in order when you press the A button?
-

Boolean blocks can be found under the Logic menu in MakeCode. They can be found underneath the Conditional and Comparison blocks.Sometimes we want to be able to check whether something in our code is true or false, but our programs can become complex if we have to use multiple
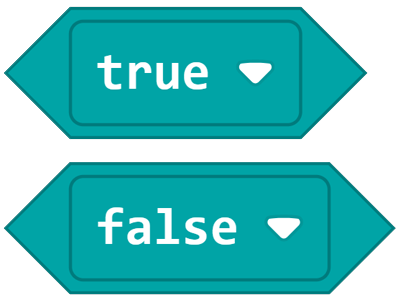
if true then else blocks and have to continuously ask the devices if they are returning the data that is needed, especially if these blocks are asking the same information that we have discovered previously in the code.Booleans are a special kind of variable that can only have two states: they can be true, or they can be false. Using booleans can allow us to run these calculations faster while taking up less storage space, and also store a true or false outcome. Our program can then simply ask for the stored value and can easily change how the code acts, depending on the returned state.
For example, if something could be on or off, then you could use a boolean to track that. If something could be empty or not empty, then a boolean can track that too.
You might not realise it, but we’ve actually used booleans a lot already. Booleans are hidden ‘behind the scenes’ in many blocks within MakeCode. Buttons are one example of functions on the micro:bit that use booleans to decide whether the button is currently being pressed.
Here’s a way to think about it:
- If you are pressing down button A with your finger, it is pressed in, and the button pressed variable is set to true.
- If you remove your finger from button A, it is not pressed in, and the button pressed variable is set to false.
These values are recorded and at any time, you can check the state of the button A pressed variable to see whether the button is currently being pressed or not. The micro:bit makes this easy for us by giving us the blocks we have used before in the Input menu and hides away this more complex coding; but we can use booleans to create our own code that relies on storing whether something is in a state of being true or false.
-
The Challenge
- If the A button is pressed, an RGB LED will show a yellow colour.
- If the A button is pressed again, the RGB LED will turn off.
Required Devices
- 1 micro:bit
- 1 sensor:bit
- 1 Digital RGB LED
Suggested Blocks
- on start
- on button A pressed
- if true than else
- 0 = 0
- true
- false
- [variable]
- set [variable] to
- set strip to neopixel
- strip show colour
Hint
- Remember that making your RGB LED show a black colour is the same as turning it off.
- If the A button is pressed, an RGB LED will show a yellow colour.
-
The Challenge
- When the micro:bit detects a loud noise, an RGB LED will turn on.
- If the light is already on when a loud noise is detected, the light will turn off instead.
Required Devices
- 1 micro:bit
- 1 sensor:bit
- 1 Digital RGB LED
Suggested Blocks
- on start
- on loud sound
- 0 = 0
- true
- false
- if true then else
- [variable name]
- set [variable name] to
- strip show colour
- set strip to NeoPixel
Hints
- This is an extra challenging challenge! If you aren't able to solve this one right away, you can move on to the next lesson and come back to it later.
- You can put true/false boolean blocks in some of the places you can put numbers, strings and named variables. You'll need to use this trick if you want to use booleans to complete this challenge.
Bonus Challenges
- Instead of turning the light on and off with a clap, can you use a clap to randomly change the colour of the RGB LED?
- In this challenge, we used boolean (true/false) values to keep track of whether our light was on or off. Could you do that with the numbers 1 and 0 instead and not use true and false at all?
-
In this lesson we've learned how to use the built-in microphone and the Neopixel RGB LED, how to pick a random number, and how to use booleans to store true and false values.
In the next lesson we'll challenge you to combine all the things you've learned in this module to design your very own smart home.