2.3 Automatic Pet Feeder
-
Do you have a pet? Do they eat all their food at once? One way to prevent this is with an automatic pet feeder.
Automatic feeders can work in all sorts of different ways, but we’re going to make one that works on a timer and a motion sensor. To open and close the lid of the food bowl, we’ll use a servo motor. This is a special kind of motor that can move to a certain position instead of just turning on and off.
-
A servo motor is a special type of motor used to move something to a certain position. Unlike a normal motor like we might find on a fan, a servo motor generally doesn’t spin around and around. One example of a servo motor is in a boom gate, which has an up position and a down position.
Servo motors generally have an ‘arm’ attached to them that moves with the motor. We can attach objects to this arm to make them move. We might also use gears or other types of linkages to move larger objects or loads.
Different types of servo motors allow different amounts of rotation. The one in our kit can rotate through 180 degrees. The micro:bit allows us to send signals to set the servo to any position within the range.
-

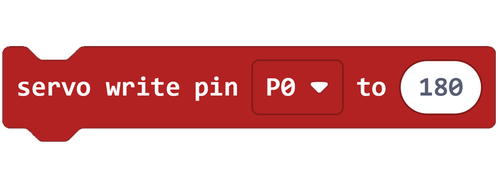
Servo Pins are a special type of output from the micro:bit specifically for controlling servo motors. You can find the two servo pin code blocks in the Pins menu, which is in the Advanced section of Makecode. For this lesson, we'll be using the servo write pin block.
Unlike Digital Pins that just turn things on or off, Servo Pins allow us to send a range of values to the servo motor. The values that we send will represent the angle that we want our servo motor to move to. For example, we could set the code block to tell a servo attached to Pin 1 to move to 90 degrees.
Here are some tips on how to use the servo write pin block:
- You can find the servo write pin block in the Pins menu, which is in the Advanced section of MakeCode.
- The servo write pin block allows us to send a value to the servo motor.
- The value we send represents the new angle of the servo motor.
-
The Challenge
- When you press the A button the servo motor rotates to 180 degrees.
- When you press the B button the servo motor rotates to 0 degrees.
Required Devices
- 1 micro:bit
- 1 sensor:bit
- 1 servo motor
Suggested Blocks
- on button pressed
- servo write pin
Bonus Challenge
- Can you change your code so that when you press the A and B buttons together, the servo moves to the halfway point?
- Can you change your code so that when you press the A button the servo moves to 180 degrees, then, when you press the A button again the servo moves to 0 degrees? Can you make this work reliably over and over again?
-
We’ve already looked at how we can use the accelerometer on the micro:bit to detect motion, but this is limited to when the micro:bit itself is being moved. What if we wanted to detect when something was moving from a distance? We can do this with a special type of motion sensor.
These devices are called passive infra red sensors or PIRs, but most people just call them motion sensors - so we will too. These motion sensors work a little bit like a camera - the little white cap at the front is the lens. Rather than producing a picture though, the camera is looking for movement.
When it detects motion it sends a signal to the micro:bit saying that there is movement, and the signal stops when there is no movement. However, the signal will continue until a few seconds after the movement stops. That extra delay is called ‘latching’ and is used so that the micro:bit doesn’t miss very slight movements.
Our motion sensor has a little blue light on it that turns on while the motion sensor is latched. More sophisticated motion sensors allow you to adjust how long the latching will last, and also how much movement is needed to set the motion sensor off. This sensor isn't that sophisticated, but it will let us learn the basic principles.
-

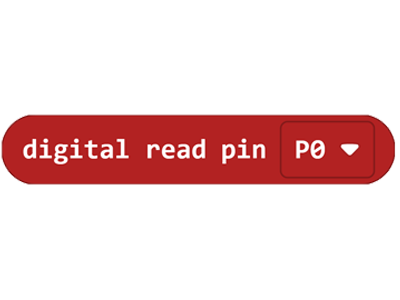
External inputs and outputs can be connected to a micro:bit or sensor:bit, but physically connecting a component to a device is only the first step. For actually communicating with a component, we can use the digital read pin and
digital write pin blocks. These code blocks are found in the Pins menu in MakeCode, which is under the Advanced menu.
The digital read pin block is a rounded block, which means it represents a value. We can use this block to read the current value of the selected pin. A digital read can return one of two different values. If a signal is present it will return a 1. If no signal is present, it returns a 0.
Here are some tips on how to use digital read blocks:
- The digital read pin block can be used to check whether a component is on or off: 1 is on, and 0 is off.
- The digital read pin block can be used in if true then blocks to make sure that code only runs if a pin has a certain value.
-
The Challenge
- When the motion sensor detects movement, a tick will show on the micro:bit display.
- When the motion sensor does not detect movement, a cross will show on the micro:bit display.
Required Devices
- 1 micro:bit
- 1 sensor:bit
- 1 PIR motion sensor
Suggested Blocks
- forever
- show icon
- if true then else
- 0 = 0
- digital read
Bonus Challenges
- Can you use a different method of output to show if there is movement detected? What about playing a sound when movement is detected, or turning on a fan?
- Could you create a basic security system by connecting a motion sensor to one micro:bit and using another micro:bit to monitor its status? When the motion sensor is triggered, send a radio message to another micro:bit to alert someone in another room.
-

Crafting Supplies
- 1 plastic bowl
- 1 plastic plate
- 1 pen
- 2 wooden skewers
- 1 pair of scissors
- sticky tape or blue tack
- 1 cardboard box
- 1 servo motor (included in micro:bit kit)
Process
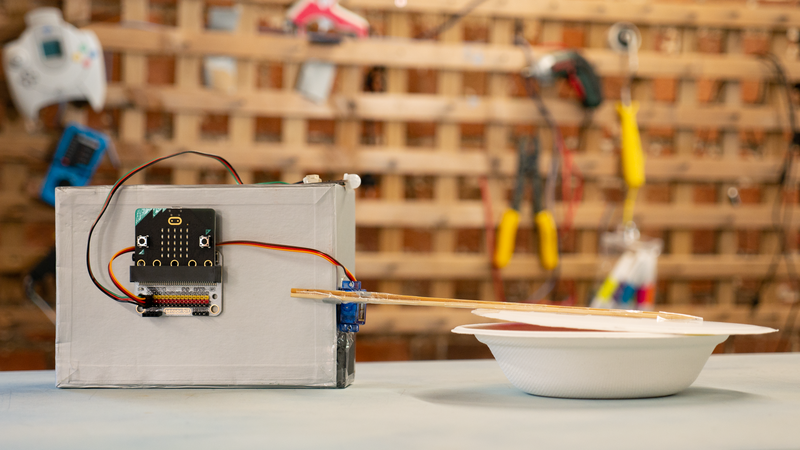
Our goal with this activity is to create a lid for our bowl and to fasten the lid to a skewer, which is then fastened to the servo, and is then fastened to a supporting post to hold it all together.
- Place the top of the plastic bowl face-down onto the plastic plate. Trace around the bowl using your pen. Using the scissors, cut around the line on the plate. The bowl will be your pet bowl and the plate will be your lid.
- Use your sticky tape to stick one end of the wooden skewer to your lid. Use your sticky tape to stick the other end of the wooden skewer to the white plastic piece of your servo motor. This skewer is what we will use to attach the servo motor to the lid.
- Use your sticky tape to stick the servo motor to the firm cardboard box. Make sure that your stick your servo to the box in a way that keeps the lid horizontal and makes it easy to attach the skewer to the lid. If you're worried about your box falling over, try adding something heavy inside it to hold it in place.
- Connect your servo motor to your micro:bit and test your pet feeder! You can also decorate your box, your lid and your bowl if you wish!
Hints
- If you don't have a plastic plate, a piece of cardboard will do the trick.
- Sometimes when you first plug a servo motor in, it's not actually at its zero position. This can happen because it has moved around since it was last used, or the person who last used it unplugged it when it was at another orientation. To make this activity easier, you might want to plug in your servo and write a quick program to move to it the zero position before you start crafting. Then you can set your skewer up at the zero position, and to move your lid to a vertical orientation you'll just need to move the servo to 90 degrees.
-

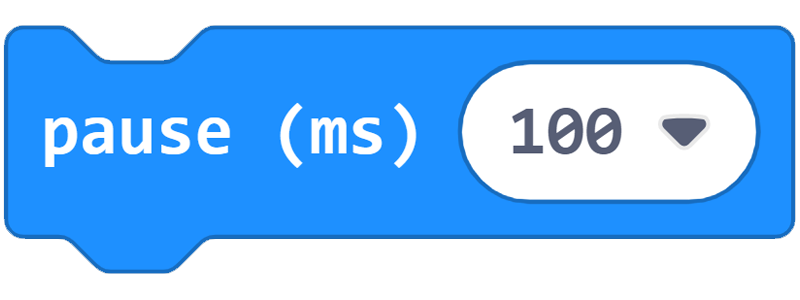
The pause block is used to tell the micro:bit to wait for a given length of time before running the next block of code. This can be extremely useful in long code sequences to make sure everything runs correctly.
Some actions on the micro:bit take a certain amount of time to complete. If the micro:bit attempts to run a code block while another action is currently in process, the new code might be blocked by the existing action, and will have to wait for other code to finish running before it can start. We can use the pause block to tell the micro:bit to wait long enough for a certain action to finish, to make sure everything runs correctly.
The pause block measures time in milliseconds. A millisecond is one-thousandth of a second. 1000 milliseconds equals 1 second. The smallest interval we can use in the pause block is 100 milliseconds, which equals one-tenth of a second.
Here are some tips on how to use the pause block:
- You can find the pause block in the Basic menu in MakeCode.
- The pause block tells the micro:bit to wait for a certain amount of time before running the next piece of code.
- The pause block measures time in milliseconds.
-
The Challenge
- Open the food bowl for 10 seconds when a pet comes near it.
- Show a tick on the micro:bit display to indicate when the bowl is open.
- Close the food bowl 10 seconds after opening it.
- Show a cross on the display to indicate when the bowl is closed.
Required Devices
- 1 micro:bit
- 1 sensor:bit
- 1 PIR motion sensor
- 1 servo motor
Suggested Blocks
- on start
- forever
- pause
- show icon
- if true then else
- 0 = 0
- digital read
- servo write pin
Bonus Challenges
- Can you include an override button that the pet could press to open the pet feeder, even when the timer is still counting down?
- Could you use radio communication with another micro:bit to open/close two pet feeders at the same time? Maybe this could help stop two pets from stealing one another's food?
-
In this lesson we've learned how to program a countdown timer, how to use a servo motor, and how to use a motion sensor, and we put it all together to build an automatic pet feeder.
Next, we'll learn to use some new hardware including a microphone and an RGB LED, we'll learn how to pick a random value, and about the power of true and false.