3.1 Soil Moisture
-
Have you ever grown your own plants? All plants need some amount of water to survive - but how much do you give them? And how can you tell if they have enough water already?
In this lesson, we'll use our micro:bit to build a portable device that lets us determine how much moisture is present in the soil.
-

Soil is a complex mixture of minerals (dirt), nutrients (plant food), moisture (water), and air. Different types of soil have different mixtures of these elements.
Water conducts electricity, and we can use this to get a reading on the amount of water in our soil. To do this, we'll need to make a probe using something else that conducts electricity.
Crafting Supplies
- 2 nails
- 2 alligator clips
- 2 pots or cups
- 1 bag of soil / dirt
- water
Process
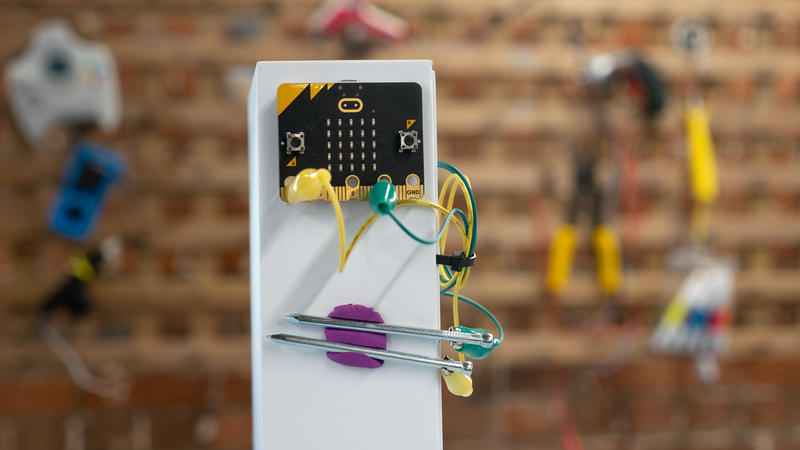
Most metals are great conductors of electricity, so these nails attached to alligator clips should do the job. We'll attach the nails to the alligator clips, then insert the nails into the soil. We can then connect the alligator clips directly to the micro:bit using the pins: the holes at the bottom of the micro:bit.
These holes are labelled, and correspond to pins 0, 1, 2, the 3.3V power output, and the ground pin.
One alligator clip should attach to pin 0, and the other to the 3.3V power output. Once we’ve wired up our soil moisture probe, we're almost ready to test it!Dry soil is not a very good conductor. Electricity has a hard time getting from one nail to the next, because the soil resists the flow of electricity. As the soil gets wetter though, the amount of electricity it conducts increases - another way to think about this is that the resistance decreases. We can measure this with the micro:bit using an
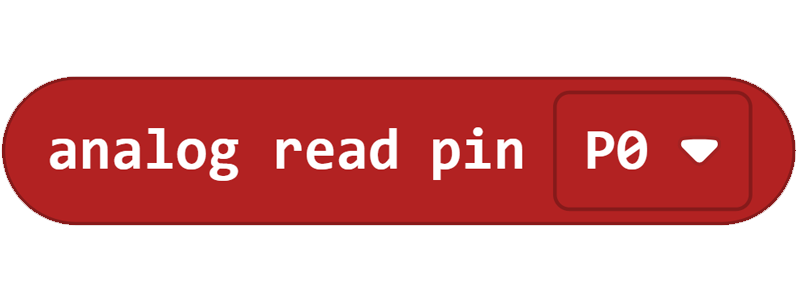
analog read. Let's write some testing code! -

As you may remember, there are two different kinds of sensors that you might encounter. Digital sensors can only send values of 1 and 0 (or on and off). Analog sensors can send values in a much wider range, from 0 to 1023. Analog sensors are particularly helpful for measuring things like light, moisture and humidity.
Rather than just knowing that something is bright or dark, wet or dry, humid or not humid, with an analog sensor, we can measure these levels as a number.
For example, a dark room might have a light level of 0, a dim room with a lamp in the corner might have a light level of 150 and a seat near a window on a bright summer day might have a light level of 750. We could use an analog sensor and an analog read pin block to detect these different levels of light and have our program behave differently based on the number detected by the sensor.
You can also combine analog readings with variables to keep track of those readings over time. For example, you could use a variable to store the highest and lowest values that you’ve received from a sensor over time.
You can find the analog read pin block in the Pins menu in MakeCode.
-
The Challenge
- When you press the A Button, the current soil moisture will be shown as a number on the micro:bit display.
Required Devices
- 1 micro:bit
- 2 alligator clips
- 2 nails
Suggested Blocks
- show number
- on button pressed
- analog read
- When you press the A Button, the current soil moisture will be shown as a number on the micro:bit display.
-
Now we've written the code, let's test our probe. The easiest way is with two pots of soil. Let's fill one pot with dry soil, and the other with lightly watered soil.
Insert both your nails into the dry pot, making sure they are not touching. Run your code, and check the measurement.
Now try moving them to the watered pot and make another measurement. You should see a higher reading in the pot with a higher moisture content. The damp soil in this pot allows more electricity to flow between the two nails.
The more electricity that gets through, the higher the analog read value. If the soil is dry, then less electricity will pass between the nails and the reading will be lower.
-
The Challenge
- The current soil moisture reading is represented on the micro:bit display as a bar graph.
Required Devices
- 1 micro:bit
- 2 alligator clips
- 2 nails
Suggested Blocks
- forever
- plot bar graph
- analog read
-

When you use code blocks that record or read data, you might notice a new button appearing under the micro:bit simulator in MakeCode.
The show console simulator button allows you to view the data that your micro:bit is collecting. You can view the data as a list of numbers (with each new reading appearing the moment the micro:bit records it), or you can view your data as a line graph which shows how the values are changing over time.
To make sure the console is showing correct data, you'll need to have your micro:bit plugged in and paired before opening the console
For example, if you are using an analog read block with a moisture sensor, you can view that data in the MakeCode console, as long as your micro:bit is plugged in or paired with your computer. This can be very helpful for testing your code, and can also help you make sense of the data you've collected.
-
A moisture sensor is a simple device that can be used to measure how much moisture is present in a soil sample.
The device itself is a shaped piece of printed circuit board, with two exposed ‘prongs’ that can stick into the soil.
This allows for a consistent reading between the two sides of the probe and functions in the same manner as the DIY probe that we created.
-
The Challenge
- When you press the A button the micro:bit takes a reading using a moisture sensor.
- The micro:bit remembers the highest and lowest soil moisture readings it has recorded.
- When you press the B button, the micro:bit shows the highest and lowest readings so far on its display.
Required Devices- 1 micro:bit
- 1 sensor:bit
- 1 moisture sensor
Suggested Blocks
- show number
- show string
- on A button pressed
- if true then else
- 0 > 0
- [variable]
- set [variable] to
- analog read
- When you press the A button the micro:bit takes a reading using a moisture sensor.
-
In this lesson we've built our own soil moisture probe, learned how to use the MakeCode console to examine our data, and used a more advanced moisture sensor.
In the next lesson, we'll learn how to make an automatic plant waterer!