4.3 Traffic Light
-
Have you every wondered how traffic lights know when to change colours? There are multiple ways in which this can work, and these can depend upon the size and frequency of the street, town, or city. Some traffic detection methods include the use of timers, weight sensors, magnetic sensors, radars, video cameras or lasers.
For this lesson, we will be building our own timed traffic light that will continue to cycle between green, orange and red lights. We will also build a T-intersection that will change the schedule of the traffic lights when a car is magnetically detected to approach the intersection. Afterwards, the lights and timer will then return to normal cycle.
We will also experiment with a pedestrian button that, once pressed, stops all cars on the road so that a pedestrian can cross safely, before the lights resume their normal cycle.
-

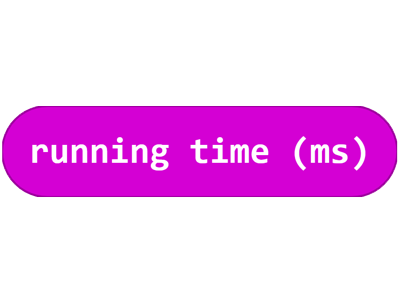
The running time variable can be found in the Input menu of MakeCode and operates in milliseconds (ms). This variable begins with no value but keeps track of how long the micro:bit has been operating. Once the micro:bit begins to run its code, the running time value will increase and will constantly update to track the elapsed time.
-

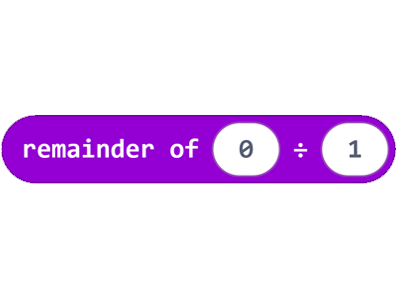
The remainder of block can be found in the Math Menu in MakeCode and divides two values to gain a result.
In the following lesson, we will be using the running time variable and will be dividing that value by 15000.
In a millisecond timeframe, 15000 = 15 seconds.This is another method of creating a timer in MakeCode. We have created other forms of timers in past lessons, but this block uses the running time of the micro:bit to keep track of how much time has passed.
By setting the value to 15000, we are creating a 15-second timer that uses the current running time of the micro:bit to determine when to repeat another cycle of the 15-second timer. -
The Challenge
- Use three RGB LEDs to represent the red, yellow and green lights of a traffic light.
- Create a 15 second timer that cycles through each light.
- Show the red light for 6 seconds, the green light for 6 seconds and the yellow light 3 seconds.
Required Devices
- 1 micro:bit
- 1 sensor:bit
- 3 RGB LEDs
Suggested Blocks
- on start
- forever
- running time (ms)
- if true then else
- 0 = 0
- 0 < 0
- 0 > 0
- set [variable] to
- [variable]
- remainder of
- set strip to neopixel
- strip set pixel colour at
- strip show
Hints
- Make sure you save your work at the end of this challenge and give your project a descriptive name so you can find it easily later. You can use the code you write for this challenge as the starting point for the next one.
Bonus Challenges
- Can you use the Loop menu to create your traffic light cycle? Try the repeat and while true blocks. We haven't used those blocks yet, but see if you can figure out how they work yourself.
- Use three RGB LEDs to represent the red, yellow and green lights of a traffic light.
-

The wait for event block can be found in the Control menu of the Advanced drop-down menu in MakeCode. This block makes the code that follows wait for two conditions to be met before that code is executed. The first condition is to receive an instruction from another code block (this could be from another variable, or could also be the value detected from a sensor). The second condition needed is to receive a specific value from that input block.
-
The Challenge
From the previous challenge:
- Use three RGB LEDs to represent the red, yellow and
green lights of a traffic light. - Create a 15 second timer that cycles through each light.
- Show the red light for 6 seconds, the green light for 6 seconds and the yellow light 3 seconds.
For this challenge:
- Your traffic light is on a main road.
- When the magnetic sensor detects a car entering the intersection from a side road, the traffic light timer is interrupted and the lights change to orange, and then to red.
- Wait 15 seconds to give the car on the side road time to turn onto the main road, then resume the normal timing cycle for the traffic light on the main road.
Required Devices
- 1 micro:bit
- 1 sensor:bit
- 3 RGB LEDs
- 1 magnetic sensor
Suggested Blocks
- on start
- forever
- pause (ms)
- running time (ms)
- if true then else
- 0 = 0
- 0 > 0
- 0 < 0
- set [variable] to
- [variable]
- remainder of
- strip set pixel colour at
- strip show
- set strip to neopixel
- digital read pin
- digital write pin
- wait for event
Bonus Challenges
- Can you implement a different method of car detection? Could you use the PIR motion sensor? What about the microphone? What about using all 3 (motion, sound and magnetic)?
- Use three RGB LEDs to represent the red, yellow and
-
The Challenge
From the previous challenges:
- Use three RGB LEDs to represent the red, yellow and green lights of a traffic light.
- Create a 15 second timer that cycles through each light.
- Show the red light for 6 seconds, the green light for 6 seconds and the yellow light 3 seconds.
For this challenge:
- When you press the A button, the timer is interrupted and the lights change to orange, and then to red.
- A person walking animation shows on the micro:bit LED display for 10 seconds, and then the timer resumes its normal cycle.
Required Devices
- 1 micro:bit
- 1 sensor:bit
- 3 RGB LEDs
- 1 magnetic sensor
Suggested Blocks
- on start
- forever
- pause (ms)
- show leds
- running time (ms)
- on button pressed
- stop animation
- if true then else
- 0 = 0
- 0 > 0
- 0 < 0
- set [variable] to
- [variable]
- remainder of
- strip set pixel colour
- strip show
- set strip to neopixel
Bonus Challenge
- Can you use the micro:bit display to show the amount of time the pedestrian has left to cross the road, instead of the walking animation?
- Use three RGB LEDs to represent the red, yellow and green lights of a traffic light.
-

Crafting Supplies
- 1 flat piece of board (approx. 8cm x 30cm)
- 3 pieces of coloured paper
- 1 pair of scissors
- 1 pen
- 1 circular object (to trace around)
- sticky tape or Blu-Tack
Process
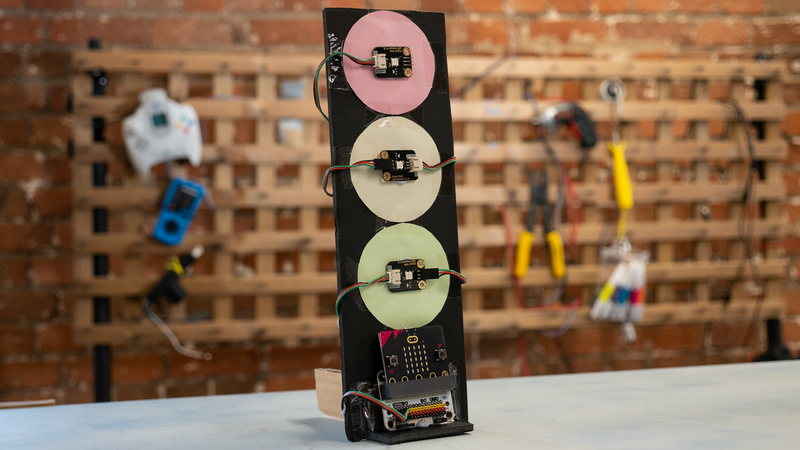
Our goal with this activity is to create a traffic light post to mount your micro:bit and three RGB LEDs.
- Take your flat piece of board and, using sticky tape or Blu-Tack, stick your micro:bit, sensor:bit and the three RGB LEDs to the board. Set things up so that your red LED is on top, your yellow LED is in the middle and your green LED is on the bottom, just like a real traffic light.
- Place your circular object onto each of the coloured sheets of paper and trace around them with your pen. Cut out the circles with your scissors. Also cut out an ‘inner-circle’ with the scissors, so that your paper winds up looking like a donut.
- Using the sticky tape / Blu-Tack, stick the coloured paper circles over the same-coloured RGB LEDs.
- Make sure that all sensors and RGB LEDs are connected to the micro:bit correctly. If so, plug in the micro:bit to a power-source (either a laptop or battery pack)
-
In this lesson we've learned how to program and build our own traffic light, with a vehicle sensor and a pedestrian button.
In the next lesson, we'll look at how we can use technology to assist emergency vehicles.