4.1 Traffic Sensor
-
Often in order to solve problems, it’s important to gather some information. As we've already learned, one common way to gather information is by using some sort of sensor.
One sensor you've almost certainly been through, but perhaps without noticing, is a traffic sensor. A traffic sensor might be used to count the number of cars that travel on a particular road, or it might be used to detect whether or not a car is present in order to make a decision.
A common example of this is in a parking garage. Many parking garages use a boom gate in order to control cars that are entering or exiting. When you enter a parking garage, you need to press a button and take a ticket that records the time you have entered. To stop people from pressing the button and taking a ticket just before they leave (and paying less for their parking), boom gates use a traffic sensor to check whether or not a car is present before printing a ticket. These sensors may work by using a very large pressure plate, or even more sophisticated systems involving video cameras or radar.
For this lesson, we will be building our own DIY traffic sensor using two strips of aluminium foil. We will also use a magnetic sensor to make a traffic counter. Finally, we will connect our traffic sensor to a boom gate, so we can set the gate to open only when the button is pressed and a car is present.
-


Crafting Supplies
- Aluminium foil
- Cardboard
- Glue stick
- Blu-tack
- 1 pair of scissors
- Optional : Toy car, matchbox
Process
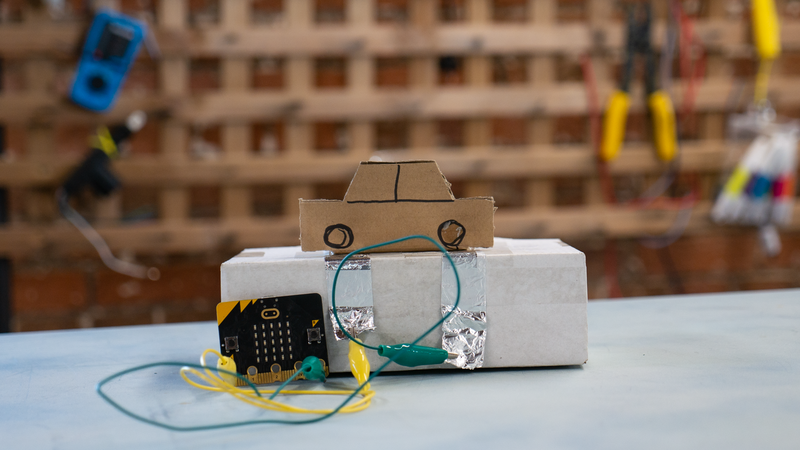
Our DIY traffic sensor is a very simple electronic circuit. We are placing two strips of aluminium foil on our 'road' and connecting them to our micro:bit via alligator clips. Our 'car' will also have a strip of aluminium foil on the bottom, which will complete the circuit when it drives over the sensor.
- Cut two strips of aluminium foil approximately 5cm x 15cm.
- Cut two strips of cardboard approximately 3cm x 12cm.
- Run a strip of glue down the cardboard strip, then place it in the middle of the aluminium foil strip (lengthways), and all the way to one end so that 3cm of foil is sticking out at the bottom.
- Fold over the aluminium foil (lengthways), so that there is 1cm along either edge of the cardboard. Glue these folds down. This should leave you with a 3cm ‘tab’ of foil at the end.
- The side of the cardboard that is fully covered with the aluminium foil is the ‘top’ of the sensor. Put Blu-tack on the bottom of the strips and tack them to your bench approximately 2cm apart.
- Fold up the two tabs. Attach an alligator clip to each of these tabs, and attach those to your microbit’s pin 1 and 3v connectors.
Now we need to prepare a car to trigger the sensor. You can either use a toy car or a match box, or you can simply cut a shape out of cardboard to represent a car. It must have a flat bottom to work.
- Once you have worked out what you are going to use for your car, take another square of aluminium foil, approximately 5 x 5cm. Fold it over several times until you have a 1cm x 5cm thickened strip of foil.
- Attach this to the bottom of your car (glue it on if you’ve made your own car), or use a small piece of Blu-tack to stick it to the bottom of a toy car.
- You can now test your sensor! If you drive your car over the two strips, when it makes contact with both parts of the sensor it will complete a circuit, telling your micro:bit that your car is in position!
-
The Challenge
- If a car is not present, show a cross on the micro:bit display.
- If a car is present, show a tick on the micro:bit display.
Required Devices
- 1 micro:bit
- 2 alligator clips
- 1 DIY traffic sensor
Suggested blocks
- forever
- show leds
- if true then else
- 0 = 0
- 0 > 0
- 0 < 0
- digital read
Hints
- You will need the DIY traffic sensor you built in the previous activity to complete this challenge.
-
A magnetic sensor is a simple digital sensor that detects the presence of a magnet. When a magnet is placed close to the sensor, the sensor will close a circuit, allowing power to flow through it. When no magnetic is near the sensor, the circuit will remain open and no power is passed through. We can use a digital read on the pin the sensor is connected to in order to see whether there is a magnet near the sensor or not.
Our magnet sensor also has a tiny LED light on it that turns on when a magnet is present (provided the sensor is powered up that is!).
-

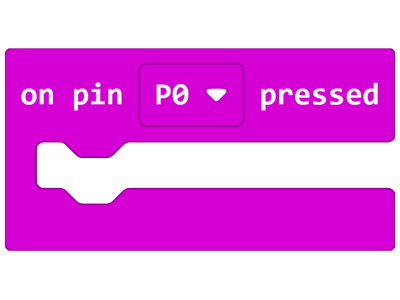
The on pin pressed block is very similar to a block we’ve been using for quite some time:
on button pressed. This block will allow us to use an input from one of the pins in a very similar way. When a pin receives power from an external sensor, on pin pressed will trigger. This is really useful for when we only want to act on an input a single time. For instance, when we want to count the number of times that an input has been triggered.Another way we can do this is to use a digital read in our forever block to check the status of an input, but depending on our program we might need to create extra variables to ensure that we are only counting the input once, rather than each time the loop runs.
-
The Challenge
- Use a magnetic sensor to detect when a car passes over the sensor.
- Count each car as it travels over the sensor.
- When you press the A button, the number of cars detected by the sensor will show on the micro:bit display.
- When you press the B button, reset the counter to zero.
Required Devices
- 1 micro:bit
- 1 sensor:bit
- 1 magnetic sensor
- 1 magnet
Suggested Blocks
- show number
- on pin pressed
- on button pressed
- set [variable] to
- [variable]
- change [variable] to
Bonus Challenges
- Can you complete this challenge without using
on pin pressed? It’s harder than you think!
-
Sometimes when we write a program we want to know whether or not a certain condition has been met. We've already done this in some of our programs, using logic blocks to compare whether a value is above or below a threshold.
When doing this we tend to check the value in a logic block, and then run one set of code or the other. But sometimes we just want to check whether a condition has been met and note that for later. In these instances we use booleans to represent states.States are a very useful concept that tell us what is happening in a program. One way we might use states is to note that a condition has been met. We might not want to act on that trigger immediately - we might want to note it down for use later.
An example of this might be when we use a servo to open a door. If the door is already open, we might not want to open it again. So we can create a boolean called DoorIsOpen and set it to true when we open the door. The next time that we want to open the door, we can check whether DoorIsOpen is true, and if it is already open, take no further action.
If DoorIsOpen is false however, we can send the command to open the door. When we close the door, we can also set DoorIsOpen to false. If we have lots of doors in our project, we could create states for each door so that we can then write better programs that can take different actions based on the states of all the doors in the project.
States might seem a bit confusing at first, but they are just a different way of thinking about the booleans we've used earlier.
-
The Challenge
Use a servo to represent a boom gate in a car park. The boom gate must stay up until 5 seconds after the car drives over the sensor.
- When you press the A button, the boom gate will raise, but only if a car is over the magnetic sensor.
Required Devices
- 1 micro:bit
- 1 sensor:bit
- 1 magnetic sensor
- 1 magnet
- 1 servo motor
Suggested Blocks
- on start
- forever
- pause
- show icon
- on pin pressed
- on button pressed
- [variable]
- set [variable] to
- servo write pin
- digital read pin
Bonus Challenges
- Can you add a countdown on the display before the gate closes?
-
In this lesson we've made our own traffic sensor, learned how to use a magnetic sensor, made a traffic counter, learned about states, and made our own boom gate.
In the next lesson, we'll learn how to program a smart street light!