1.3 Sensing Light
-
Lots of computers and devices use sensors to detect things happening in the real world, and trigger actions accordingly. Some examples include a sensor light that turns on automatically when someone walks past, or the light on your oven that turns off when it’s hot enough.
The micro:bit can use sensors to detect changes in the world around it. It even has a light sensor built right into the display!
-
Without light sources, we wouldn't be alive today. Light sources can be divided into two main groups: natural sources of light, and artificial sources of light.
Natural sources of light produce light in nature without any human involvement. Some examples of natural light sources are: the sun, stars, lightning strikes, bushfires, fireflies, and glow-worms.
Artificial sources of light are produced through human involvement, interaction or invention. Some examples of artificial light sources are: light bulbs, torches, lamps, lasers, fireworks, matchstick flames, and candlelight.
For this lesson, we will be working with Artificial Light Sources (primarily using light bulbs / torches) and will detecting the amount of light that is emitted from these light sources. -

The micro:bit can detect how much light there is through the display on the front of the micro:bit, which also functions as a light sensor.
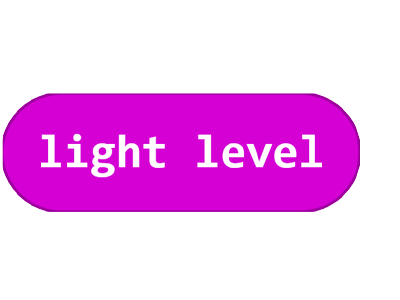
Sensors are a kind of input that can read information from the real world. Light sensors enable us to detect light levels, which we can then use to trigger an action in our code. We can use the light sensor to trigger actions in our code with the light level block.
Here are some tips on how to use the light level block:
- You can find the light level block in the Input menu in MakeCode.
- The light level block is a special block that returns a value between "0 and 255", where "0" is no detected light, and "255" is the maximum amount of light that can be detected by the sensor.
- Like other inputs, the light level block doesn’t trigger any actions on its own. It provides the value of light hitting the sensor, and we'll need to combine it with other blocks (like show number) in order to do something with it.
-
The Challenge
- When you press the A button, the current light level in the room is shown as a number on the micro:bit's display.
Required Device
- 1 micro:bit
Suggested Blocks
- show number
- light level
- on button pressed
Bonus Challenges
- Can you use a different input to cause the current light level to be shown on the micro:bit display?
-
Using the code you've written, take your micro:bit for a walk around the classroom.
Try and find the brightest spot and the darkest spot in the room.
Remember the highest (brightest) and lowest (darkest) numbers you found, and compare the results with your classmates.
Hint
- You’ll need to take your laptop with you for power via the USB cable or power your micro:bit with the battery pack.
-

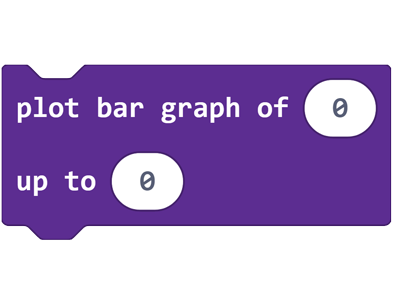
The display on the micro:bit is capable of showing a simple bar graph that can be used to track values and variables at a glance. The plot bar graph block is different in that it requires two values as inputs: the current value and the maximum value. The plot bar graph block will figure out how far to fill the bar depending on these values.
Here are some tips on how to use the plot bar graph code block:
- You can find the plot bar graph block in the Led menu in MakeCode.
- Place the plot bar graph block into the forever block for best results.
- You can drag variables and other values from inputs into the values in the plot bar graph block.
- In the plot bar graph block the first value is the current value of the bar graph, and the second value is the maximum value of the bar graph.
- The bar graph will always use 0 as the minimum value.
-
The Challenge
- Show a bar graph on the micro:bit display that fills up as more light is detected by the micro:bit.
Required Device
- 1 micro:bit
Suggested Blocks
- forever
- light level
- plot bar graph
Bonus Challenge
- Can you use a different sensor on the micro:bit and show its data on the display?
-

Often in programming and electronics we want to be able to compare two numbers or pieces of information and we only want code to run under certain conditions.
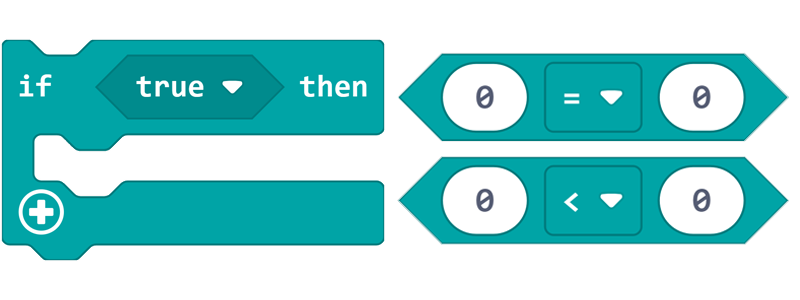
As an example, what if we wanted a light to turn off when it’s bright outside, and turn on when it’s getting dark?This is where an if true then block and a 0 = 0 block comes in.
You can find these blocks in the Logic menu in MakeCode.
A conditional block will run under certain situations. The if true then block is an example of a conditional block, and will run the code inside it if the state of the hexagonal input box is true.An if true then block, combined with a comparison block will check two values and act according to which value is true.
The 0 = 0 block checks both values. If they are the same, the comparison returns true. That’s exactly what would happen in this case, because an empty value of 0 is the same as another empty value of 0.
The 0 < 0 block also checks both values. If the number on the left was larger / smaller than the number on the right, the comparison would return false / true, depending on the direction of the greater than / less than symbol.
For example; if the comparison block showed: 2 < 5, it would give a true result, as the value of 2 is less than the value of 5. If the comparison block showed: 5 < 2, it would give a false result, as the value of 5 is not less than the value of 2. -
The Challenge
- When the light level in the room is high enough, the display on the micro:bit will turn off.
- When the light level is too low, the micro:bit display will turn on.
Required Device
- 1 micro:bit
Suggested Blocks
- forever
- show leds
- clear screen
- light level
- if true then
- 0 < 0
Bonus Challenges
- It is possible to complete this challenge without using the clear screen code block (and without adding any extra code blocks). Can you figure out a way to turn the display off using the show leds block?
- Extend the if true then block with the + button in the bottom left corner of the block. What does else do? Can you make the light sensor do more than two different things based on the brightness levels?
-
You should now know how to use the micro:bit light sensor, how to create a bar graph, and how to use Conditionals and Comparisons.
Next, we'll learn how to use Variables and the micro:bit's built-in accelerometer to create our very own step counter.