1.1 Hello World!
-
Welcome to the Bitlink Internet of Things kit! We're happy you're here. Through these lessons you'll meet micro:bit - a computer that fits in the palm of your hand - and start learning how to program it to do all sorts of cool stuff.
In this first lesson, you'll learn how to use MakeCode to program your micro:bit to show numbers and words.
-
Computers are everywhere around us. When you hear the word “computer”, you might think of personal computers - a desktop or laptop computer. Perhaps you also think of a tablet, or a mobile phone, or even a smart watch. Those are all computers, but computers are also in so many more things we interact with on a daily basis.
A computer is a machine that stores, retrieves, or processes information, often then using that information to perform a task in the real world.
Cars have computers in them to make them safer and easier to drive.
Your fridge has a computer to determine when it should be actively cooling.
Weather stations have computers to help analyse and predict the weather.
From a video game console to the sensor light in your driveway, computers help us get things done in every part of our lives. -
The micro:bit is a computer too. Small enough to hold in your hand, with all sorts of features you can use to interact with the world. We can even connect the micro:bit to other pieces of hardware to do even more things.
To start with, we’re going to use a software simulator for the micro:bit, so you can do everything in your web browser. Later on, we’ll learn how to download the code you write to the micro:bit itself.Code is how we tell a computer what to do. There’s lots of ways of writing computer code, usually known as languages. We’re going to be using a block-based code editor called MakeCode.
You can find it at: makecode.microbit.org
We’ll use MakeCode to write all of our computer programs during this course, so you might want to write the address down or create a bookmark so you can access it quickly and easily in the future.
-
MakeCode is an easy to use tool for interacting with your micro:bit. We’ll use it to write new code, test that code using the simulator, and then collect and use data from the micro:bit.
There’s a lot to explore, but let’s get started with the interface!
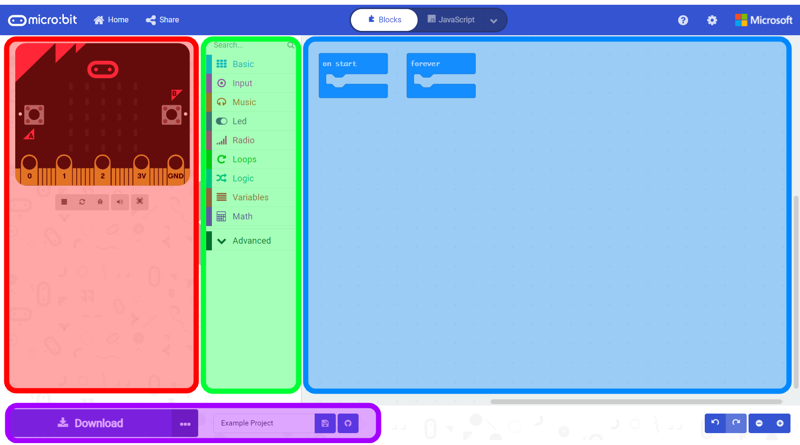
We have coloured the different sections of MakeCode in the image below to easily describe the different areas you will be using.
Blue:
This is the workspace, where we'll assemble our code. Each time we start a new project in MakeCode, there'll be an
on start and a forever block already inside the workspace.Green:
This is the library, where we'll get code blocks to assemble in the workspace. Each block is categorised so that they're easier to find based on what they do. We will call the different categories menus in all of our lessons.Red:
This is the micro:bit simulator. We'll use this virtual micro:bit to test our code without needing to upload it to a physical micro:bit.Purple:
These are the project settings, where we can change the name of the current MakeCode project, as well as download our code and transfer it to the micro:bit.Using MakeCode is easy. All we need to do is drag code blocks from the library into the workspace. Drag compatible code blocks on top of each other and slot them together to assemble code. It's as easy as that!
-

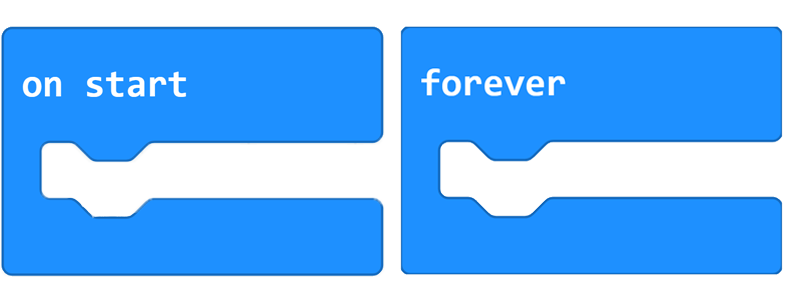
When we create a new project in MakeCode, there are two code blocks that have already been placed in the workspace for us: on start and forever. These blocks are used to run other code blocks at certain times.
Code that is attached to the on start block will run only once, starting when the micro:bit first turns on.
Code that is attached to the forever block will run over and over again. As long as the micro:bit is turned on, any code that is attached to the forever block will run continuously.Here are some tips on how to use the on start and forever blocks:
- You can find the on start and forever blocks in the Basic menu in MakeCode.
- You should attach code to the on start block if you want it to run when the micro:bit turns on.
- You should attach code to the forever block if you want it to run continuously.
- You can find the on start and forever blocks in the Basic menu in MakeCode.
-
The micro:bit has a small display on the front, made of 25 small LEDs. We can see this display in the micro:bit simulator on the left side of our MakeCode window.
The lights that make up the micro:bit display are called Light Emitting Diodes or LEDs for short. We can find LED lights in all sorts of places. Some people have LEDs in their homes, sometimes they’re used for streetlights, and they’re also very common on small devices like a handheld torch, or the micro:bit.
LEDs are useful because they don't get hot like other kinds of light bulbs, and they’re quite efficient, which means that they don’t use very much electricity to produce a lot of light. -

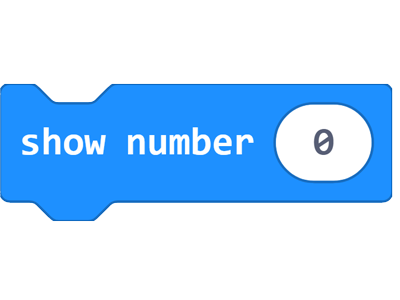
We can show a number on the micro:bit display, just by controlling which LEDs are turned on. If a number is too large to fit on the display, then it will scroll from left to right until the whole number has been shown. We can show a number on the micro:bit’s display using the show number block.
Here are some tips on how to use the show number block:
- You can find the show number code block in the Basic menu in MakeCode.
- The show number block can only show numbers.
- If your number is too long to fit on the display, it will scroll from left to right.
- You can find the show number code block in the Basic menu in MakeCode.
-
The Challenge
A number appears on the micro:bit display.
Required Device
- 1 micro:bit
Suggested Blocks
- forever
- show number
- 1 micro:bit
-
Now that we’ve tried a few challenges using the simulator to test our code, let’s test it on the micro:bit itself.
If you are using the Microsoft Edge or Google Chrome browser, you can pair the micro:bit device with our computer, so that the download button sends our code directly to the micro:bit.Pairing your Device
- Plug in your micro:bit to a computer using the USB cable.
- Click the ... button (next to the download button)
- Click Pair device.
- Click "BBC micro:bit" in the list.
- Click Connect.
- Click the Download button.
From now on, when you click the Download button, your code will immediately be sent to your micro:bit. Each time the micro:bit receives new code, it will automatically reboot and run that code.
Hint:
- If you happen to have issues with pairing your micro:bit to your computer, there is another method you can use which involves transferring the .hex file.
Transferring a file
- Plug in your micro:bit using the supplied USB cable.
- Click the Download button.
- Find the downloaded .hex file in your Downloads folder.
- Drag the .hex file to the micro:bit to copy it to the device.
When your file is copied to the micro:bit, it will automatically reboot and run your new code.
-

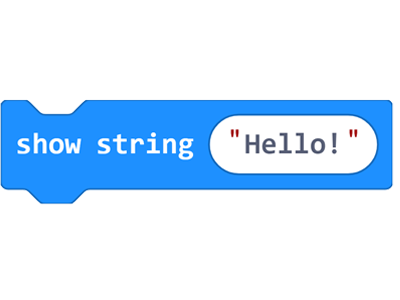
We can show words on the micro:bit display, just by controlling which LEDs are turned on. To do this, we use a show string block.
In computer programming, we use the word string to refer to data that is represented as a series of letters, punctuation, and numbers.
A string can be a word, a sentence, a series of numbers, or any combination of those.
For now, we'll use the show string block to make some words appear on the micro:bit display. If a word or sentence is too large to fit on the display, then it will scroll from left to right.Here are some tips on how to use the show string block:
- You can find the show string code block in the Basic menu in MakeCode.
- The show string block can show numbers, letters and punctuation.
- If your string is too long to fit on the display, it will scroll from left to right.
- You can find the show string code block in the Basic menu in MakeCode.
-
The Challenge
The words "Hello World!" appear on the micro:bit display.
Required Device
- 1 micro:bit
Suggested Blocks
- forever
- show string
- 1 micro:bit
-
You've reached the end of the first lesson! You should now have an idea of what the micro:bit is, and how to start using it. In the following lessons, we'll explore more of what the micro:bit can do.
In lesson 2, we'll learn how to use the buttons and the display on the micro:bit to show information.